The secret's out!!
No. I'm not pregnant. Let me just squelch your excitement now.
I'm talking about a project I was working on that I couldn't show y'all until now. You see, I made a Ragamuffin Garland to send to my sister and I didn't want her to see it before it arrived in the mail! That would have defeated my whole intention of sending her some unexpected Happy Mail.
Once again, this is a copycat project, which I found on the ever-creative Darlene's blog. In case you didn't know, I am not above copying other people's creative ideas. We can't always come up with masterpieces on our own, now can we?
Anyway, this was a super simple craft and really fun to make. I made one to send to my Sis and of course I had to make one for myself. I'm a little selfish that way. Our two garlands were slightly different but don't worry, I'll show you both of them! Remember to click on the pictures to enlarge them.
Let's get started...
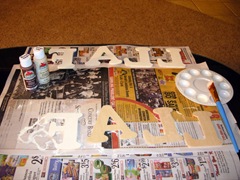
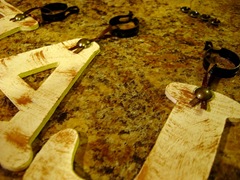
I painted my wooden letters "Antique White" so they'd have a good base for the Mod-Podge.
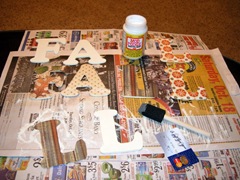
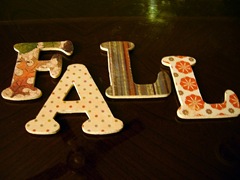
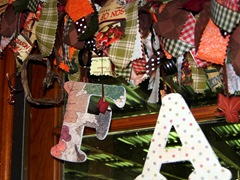
I bought fall scrapbook paper to decoupage onto the letters. Don't forget to scrape the bubbles out!!
After they were all mod-podged, I trimmed the paper really close to the edges and sanded it down the rest of the way to give an aged look.
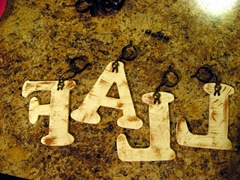
The backs of the letters got some distressing with brown paint. They have to look good from both sides, ya know!
I used some cafe rod clips (from Wal-Mart) & hot glue to attach the ribbon hangers. My handy little upholstery tacks (with most of the post clipped off) served as a finishing touch and hid the blobs of hot glue.
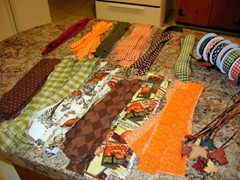
I had several fat quarters in my fabric stash and I bought some seasonal fabric on sale from Hobby Lobby. I tied some fall leaf buttons to the end of the thin brown ribbon. I found several cute rolls of ribbon on sale that I used as well. I cut them all into strips with pinking shears. My strips were about 8 to 10 inches long and 1 to 1.5 inches wide. Honestly though, after the first few pieces of fabric, I just started to eyeball it. I was a little impatient. Oh well, it turned out well in the end. I may just tear all the fabric next time. My hand was aching after all that cutting!!
I forgot to take a picture of the jute string I used to tie the ribbon onto, but it came in a big skein from Wal-Mart. You can get it at any craft store, though. I measured where I wanted to hang the garland and then I tied a loop in each end of my jute string. Hmmm, I guess I also forgot to take a pic of the actual tying process too. Oh well, here's what I did...I tied on a piece of fabric (just a single knot) to the string and pushed it up tight against the loop at the end. Make sure you slide it over the tail of the loop. Then I alternated tying on fabric, ribbon, fabric, ribbon, etc. Push all the pieces up really tight against each other so the garland will be full & fluffy. At the end of each round of fabric/ribbon, I tied on a ribbon with a button at the end. They hang down and give it a little somethin' extra. I added all my hanging doo-dads when I was done tying all the pieces to the string. You could use curtain clips that slide onto the string, but I wanted to be able to take them off easily.
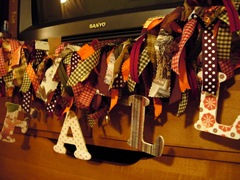
Here's my Sis's finished garland...(I didn't use the buttons in hers)
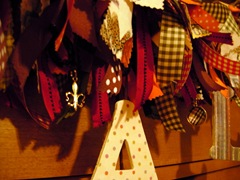
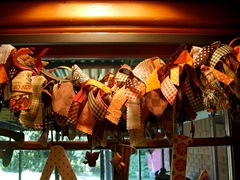
Some hidden pretties...
More hidden pretties...
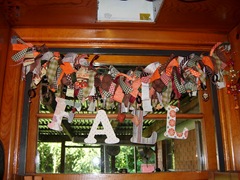
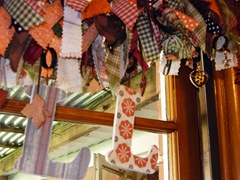
I hung mine in our kitchen window.
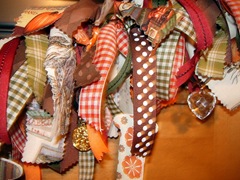
Close-ups of the details
The cafe rod clips are just clipped to the fabric.
So there you go! A cozy little garland to add some fall flair to my home. I still have some fabric left over so I'm thinking about getting one of those wire wreath frames and making a Ragamuffin Wreath! Wouldn't that be cute for Christmas, too? Or any occasion for that matter. Babies, Easter, 4th of July, you could go raggedy all year round!
Have a wonderful day, Y'all!!


Wow, it looks awesome. I've been wanting to do one too, but I'm afraid it would look wimpy. Cute idea with the charms. I'm hosting a baby shower for a girlfriend of mine. Maybe I can do one for her. It looks great, what a wonderful sister you are.
ReplyDeleteAWWW...I thought we were going to be pregnant together!
ReplyDeleteThis is the cutest thing ever!!! I LOVE it!!! :)
WOW Ashlie....that turned out FABULOUSLY!!!! You did a GREAT job on both of the garlands......I absolutely LOVE them!!!
ReplyDeleteOH I LOVE IT!!!!!!!!!!!! I am making a Hobby Lobby list right now.
ReplyDeleteThat is adorable!! I'm off to copy now... =)
ReplyDeleteAmazing! It's so cute! To answer your question, my daughter makes dolls and purses.
ReplyDeleteHugs,
Cathie
Great job on the garland's now I gotta go back to Darlene's and find the ones she made.
ReplyDeletePlease look at my last post. There's something for you
ReplyDeleteTake care
Ashlie,
ReplyDeleteIt looks amazing!! Totally wonderful! I am so jealous. I would love to be able to do something like that. Your sister will love it!! You are just too crafty for words!
Came over from Darlene's. Had to take a peak at your Ragamuffing Garland. It is really pretty and you did a fantastic job on it!
ReplyDeleteI have one that I just have to find a picture of my daughter to put in the little frame as a embellishment. Maybe I will finish it tonight.
Jody
OK...when I read your title I thought "Um, she better not be pregnant and posting it on here before telling me!" haha SO..I love this garland! What a crafty idea! I bet Laura LOVED getting it in the mail! You're such a great sis!
ReplyDeleteLove the garland it turned out great!
ReplyDeleteThat is so cute!!!!! You are so crafty! I bet that was fun to make!
ReplyDeleteI so thought you were expecting!!
You are so creativve!!!! I LOVE IT!! I will be copying!!!
ReplyDelete